22/02/2013

Cupboard for the Attic


For the attic in my Miniature House I wanted to make a cupboard. I had a plain wooden cabinet lying around so I decided to use it for this purpose. In the picture below you can see the items  I used for making my cupboard. For example, I glued a piece of decorated paper on cardboard. I cut the tiny flowers of the pattern out as little squares.


Next I sawed the wooden sticks into strips of 1 cm width. I adjusted their length and glued them on top of the cupboard as you can see in the picture below. I also drilled 4 small holes, 2 on each side of the cupboard. I put a screw in each hole and this made it possible to fit a round stick.


After that I painted the wood in red and green.


Next, I covered the whole piece with a crackling-varnish. When this had dried completely, I painted the entire surface with gesso. The gesso started to crackle very quickly! I wanted  the cupboard to have a kind of worn appearance so after the gesso had dried, I also sanded the surface.


Then, I glued the paper-squares in place like faux-tiles. And finally I applied a coat of diluted wood-stain.


So now it's finished and I can put it in place in my attic. I think I like it this way...:-)

The beautiful jug and plate are made by a miniature pottery-artist: Elisabeth Causeret.


14/02/2013

Pillow and White Seat


This is a picture of a pillow I embroidered with a stitch namend "petit-point". 
I made the white seat a long time ago, with help of a tutorial in a book mentioned in my post
about the couch and armchair.

The measurements of the cushion are  2,5 x 2,5 cm.


06/02/2013

chair with embroidered seat


In this post you can see an adittion to my first floor landing.


I took an embroidery pattern from a book and adjusted it to the measurements of the chair-seat:


The chair and table I made long ago form a kit.


Before cutting the embroidery out, I put some diluted Tacky Glue around it to prevent  it becoming frayed


Some extra filling for a really comfortable seat :-)


Finally wrapping and gluing it like a small package.

And there it is......


.


23/01/2013

Brick Wall Part 2


In this post  about making a brick-wall (part 2)  I will show you  how I coloured  and cut the sheets of sanding-paper that I used  for creating my bricks.


After priming the sheets ( I think used about 10 or 15 sheets all together) with gesso, I covered them all with a transparant  layer of burnt sienna (this is called a "glacis" in  dutch) . I let this dry throroughly. On top of that I put some burnt umber, sometimes diluted with lots of water, sometimes apllied a bit thicker.


With the burnt umber still a bit wet, I applied another layer of transparant colour, this time I used some cadmium red. Because the layer underneath is still a bit wet, both colours mix in a surprisingly way.


I made  sure to cover all the sheets of sanding-paper with multiple transparant layers of colour,
but I did not treat every sheet exactly the same as the other.
For  the bricks need to differ slightly from each other, but must harmony together.
Sometimes I waited  for the layer underneath to dry completely before applying the next one , sometimes I put a fresh layer of "glacis" on top of a still wet layer of paint. And sometimes I just let my wet  brush drip above the sheet and wait  for whatever happens. I simply experimented  a little with serveral colours, like umber, sienna, ocre, ultramarine and white.


In the end I had lot of sheets in variations of a brownish-red,
as you can see for example in the picture below.


The next step  would be cutting the sheets of sanding-paper
 in long pieces of 5 mm width.
I made a handy tool for this;  it existed of a wooden stick with two pieces of wood glued at each end of it. Both  pieces were 5 mm width, so they had exactly the measurement of the paper strips to be cut.
I  made sure the length of my sheets fitted nicely between the two  extruding  wooden parts.


In this way I cut the sheets, one after the other, in strips of 5 mm width.


I used a strong craft-knife and frequently replaced the blades for the sanding-paper blunts them in no-time!
It's really convenient  if one glues the strip of wood on a plastic household plate (for slicing vegetables, etc) so you won't ruin your cutting-mat.


As you can see, I ended up with lots of  long strips, 
slighty (but sometimes very!) different in colour from each other.


The most efficient way of cutting all strips in smaller pieces,
is by taking a single strip and drawing a vertical line every 18 mm.
I used a piece of cardboard to do this,
so I did not have to measure every 18 mm with a ruler.


When I had marked every 18 mm on  a single strip, I held this strip together with 4 or 5 other strips. With a pair of scissors I cut every pencilmark. In this way, I got  about 6 "bricks" with every singel cut.
In the end, I mixed all single " bricks" together.


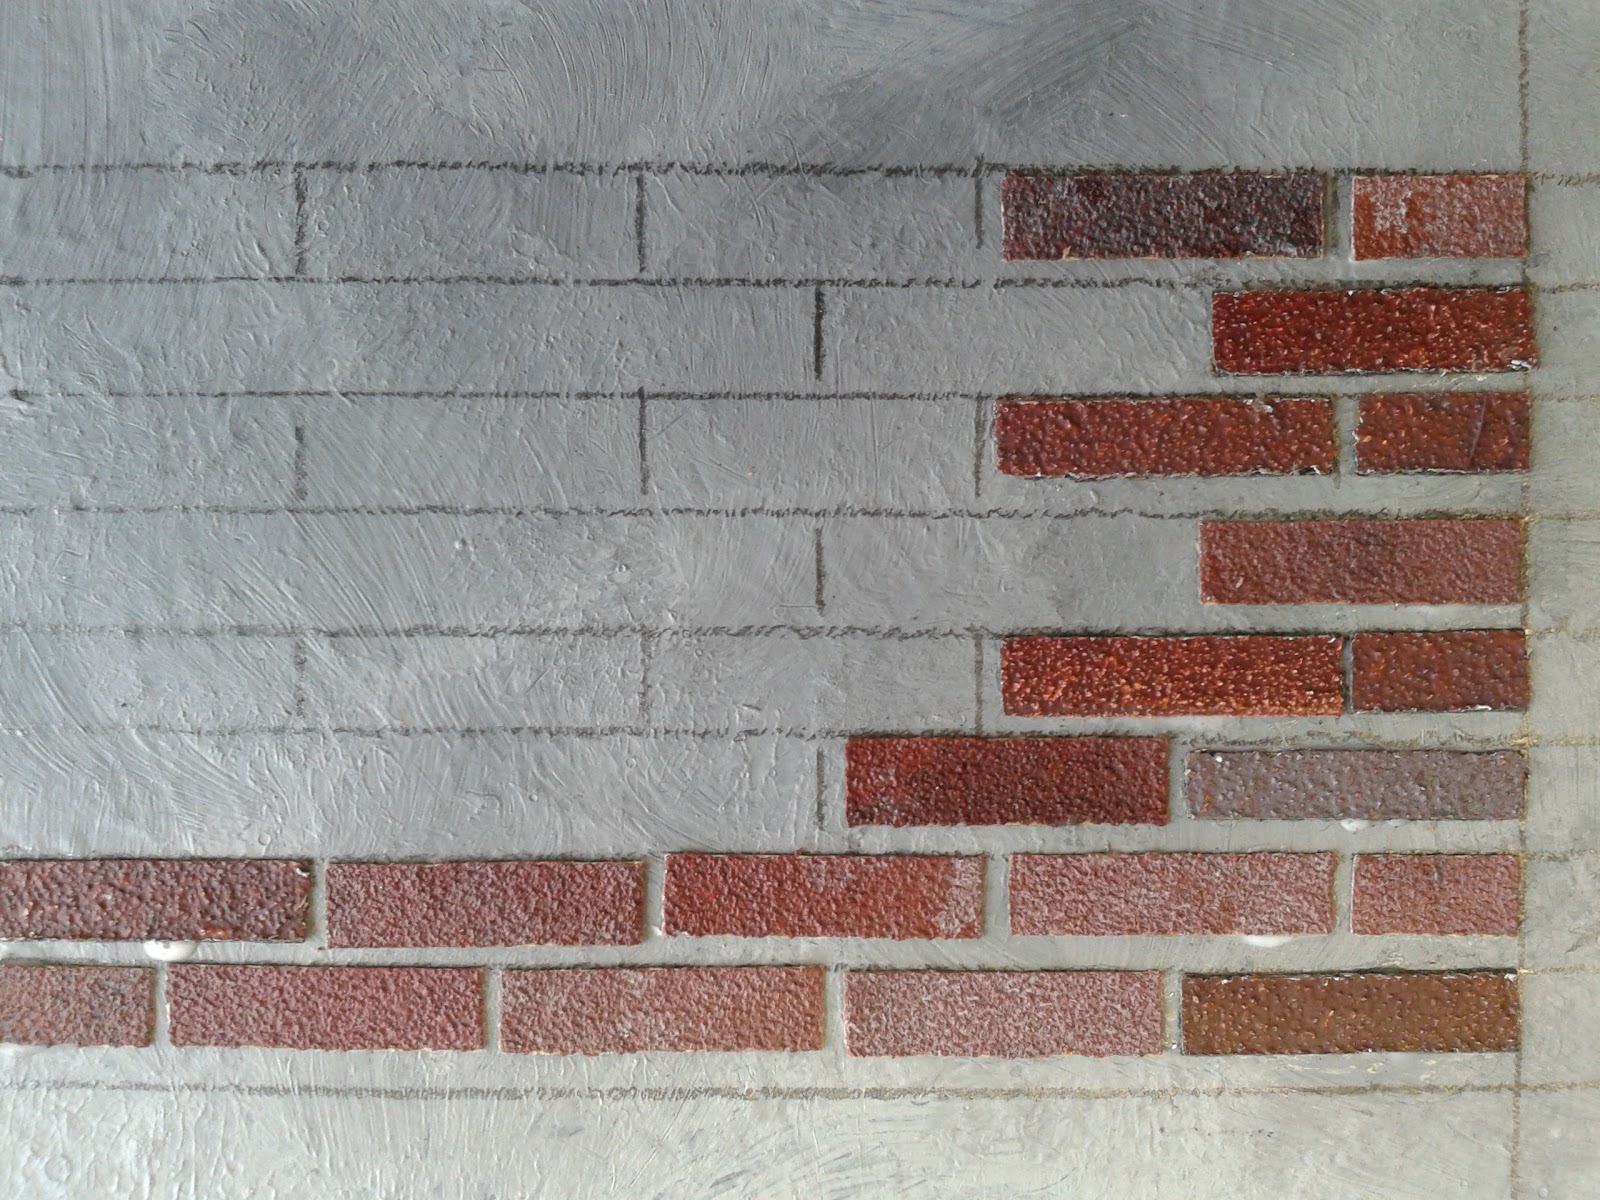
I painted the walls of the house in grey, as you can see in picture below.


After cutting all strips of sanding-paper into pieces 18 mm width, I asked the  roadmaker to drop them in front of my house :-)


Next, I drew horizontal lines on every wall of the house, perpendicular with the coners of the house. 
The distance between every horizontal line is 6 mm ( again  I used a self-made ruler, see my Post about  making a slated roof). 


 I started gluing the "bricks" on a  horizontal line, leaving about 1 mm between every "brick" .
I used white glue and this worked well.


 As you can see in the picture, I made vertical pencilmarks to be sure the bricks would  follow a straight line from the top of the house untill the groudfloor  


In this way I decorated the main walls of my house and it took me a whole winter! So now you have red both my posts about paper-bricks and you still are convinced you can do this too without having a nervous breakdown in the end, I think this is just the right technique for you :-) 


12/01/2013

Brick Wall Part 1


In this post I will make a start in showing how I decorated the outer wall of Miniature House. In reality the bricks are pieces of sanding paper, coloured with acrylic colours for artists.  It is an inexpensive way of decorating the outside of your house, but on the other hand it takes a lot of your time and patience too......
I made use of a technique that is shown in a book written by Beryl Armstrong:


In her book Beryl shows a way of cutting paper with  a self-made device to 1:12 brick-size. I did a few experiments with a variety of papers and paints before I decided on using sanding-paper with a medium grain and painting the paper myself using multiple layers of transparant colours.
I started with priming several sheets of the sanding paper with gesso:


I used a fairly rough brush and as you can see in the picture, I made a kind of stamping move with it to create even more texture than is already in the grain of the paper. I let it dry thoroughly.


Next, I took some burnt sienna and covered all the sheets with this colour, applying it unevenly so as to keep the surface lively ; sometimes really watery, sometimes using a thicker substance.


So far the first part of my brick-wall-making.  In the next post, I'll show you how I coloured and cut all sheets of sanding paper.


26/11/2012

couch and armchair


The living room just needed a cosy couch and easy chair. But I hesitated; would I make these pieces of furniture myself or would I just buy them....

I had made some furniture in the past using a helpful Dutch doll's house guide, named;
"Interieurs voor poppenkamers" (written by H. van Eck  and published by Cantecleer)


Unexpecxtedly,  I happened to find two lovely pieces of furniture in the shop of "Karweipost".
I very much liked the shape of it.  But colour and pattern of the fabric didn't match with the wallpaper of my miniature- livingroom.
I decided to buy them anyway and change their uphostery to my own taste, bearing in mind the handy tricks I had learned  from the small guide mentioned above.


 I started off with the yellow armchair and  then went on with the couch.  

First of all I carefully stripped the couch of all it's upholstery, making sure no to damage the pieces of foam, which later would be still useful beneath the new wrapping.


As you can see in the picture; I made paper templates of several wooden parts of the couch. I also added foam to the armpieces, to give the couch a real soft and cosy appearence.


 I wrapped the wooden parts, one after the other, with the cloth of my choise. I used Tacky Glue and a few nails to make sure the couch would not fall apart again.


I removed the original legs of the furniture. Instead I painted 4 pieces of nicely shaped wooden parts and split all 4 of them in half. In this way I ended up with 8 nice parts to use as legs. Doing so I could also adjust the height of the furniture to my liking. Using glue and nails I attached the small legs to the armchair and couch.


The finishing touch consisted of hiding small gaps by adding ribbon and piping, using Tacky Glue.


And how nicely they fit into the room!