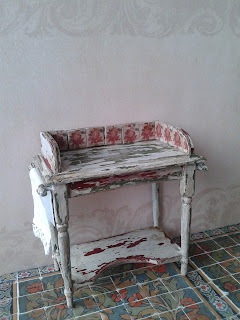
For the attic in my Miniature House I wanted to make a cupboard. I had a plain wooden cabinet lying around so I decided to use it for this purpose. In the picture below you can see the items I used for making my cupboard. For example, I glued a piece of decorated paper on cardboard. I cut the tiny flowers of the pattern out as little squares.
 |
Next I sawed the wooden sticks into strips of 1 cm width. I adjusted their length and glued them on top of the cupboard as you can see in the picture below. I also drilled 4 small holes, 2 on each side of the cupboard. I put a screw in each hole and this made it possible to fit a round stick.
After that I painted the wood in red and green.
Next, I covered the whole piece with a crackling-varnish. When this had dried completely, I painted the entire surface with gesso. The gesso started to crackle very quickly! I wanted the cupboard to have a kind of worn appearance so after the gesso had dried, I also sanded the surface.
Then, I glued the paper-squares in place like faux-tiles. And finally I applied a coat of diluted wood-stain.
So now it's finished and I can put it in place in my attic. I think I like it this way...:-)
The beautiful jug and plate are made by a miniature pottery-artist: Elisabeth Causeret.


