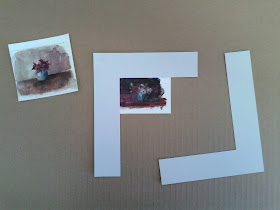
Instead of buying frames for the pictures in my Miniature House, I tried to make them with the materials I already have at home. In this post I will show you how I did this.
I started to determine the measurements of the frames I needed for the paintings by using two
L-shaped pieces of paper.
L-shaped pieces of paper.
I transferred the measurements to a piece of 1 mm cardboard and cut the rectangle or square out.
Next I took some ribbon or lace and I glued this in a straight line on a piece of 1 mm cardboard. I used a kind of white glue that can be used as a primer for acrylic paintings. (in the store of Peter van Ginkel; Mowilith DM-2)
I made sure not only to glue the fabric on the cardboard but also brush the glue over it's surface. In this way I could avoid the fabric getting fringed later in the process.
When the glue had completely dried, I cut the fabric. In the picture below you can see that I made the glued on ribbon a little less wide by cutting a long strip off. I did not want the frame to be too big and heavy around the painting.
When the ribbon was as broad as I wanted it to be, I started cutting it fit around my painting, using the template I made. You can see this in the pictures below.
On the frame, that was now created on the cardboard, I applied a coat of paint.
I glued the coloured frame onto the painting itself and cut it all out again. I applied a final layer of paint to conceal the edge of the painting underneath.
And below you can see the results;


